I’ve come up with an innovative disruption to the paradigm we use to imagine version control, leveraging tactile user experiences and a lexicon of familiar materials.
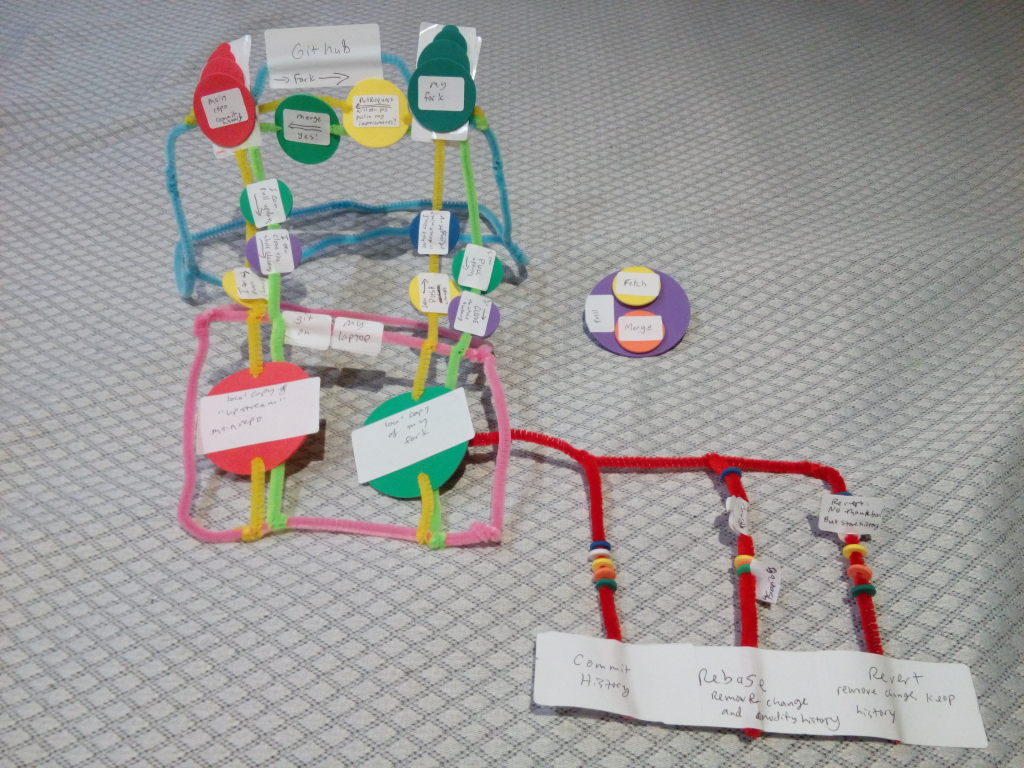
Psych! I made a model of Git and Github with pipe cleaners and K’Nex.
Git is an open source program used for version control. That means it’s used to track changes you make in individual files, and even rewind or fast forward to a particular change. It can be useful for writers and artists, but computer programmers are its main users. Github is a website where Git users can share projects, offer changes in improvements to other users, and let those changes be adopted, rejected or modified with a full history of the changes themselves and comments about them.
Git has a relatively low learning curve for simple tasks, but it’s notoriously easy to get deep in the weeds and mess things up in ways that get complicated quickly. It’s an open secret that many users keep a little stash of commands and common methods of working with Git, and if they need something off the beaten path they phone a friend and cross their fingers. Git use has a lot more individual style associated with it than anyone explained to me when I first started using it.
There are many good guides to using Git and Github, some simple and some in-depth. But I find that they often do a better job of describing how to manage the history of a change than mapping out its pathway through various systems. Over time I started to think of my Git and Github usage spatially, with my changes starting in one place, then going up, down, across or diagonally to a destination. Hammering out that spatial concept helped me remember the correct commands. Making a working model with craft supplies, I hope, can help me explain it to others. This piece names and describes the major pieces in creating local and web-hosted repositories with a focus on the direction (origin and destination) of various communications. Notably, it deals with just one common way that project groups collaborate and does not treat branches or manipulation of commit history, and does not offer specific commands, though I might add that in the future.
The concepts I’ll touch on are:
- init
- repo
- commit
- remote
- origin
- upstream
- fork
- push
- pull
- clone
- pull request
- code review
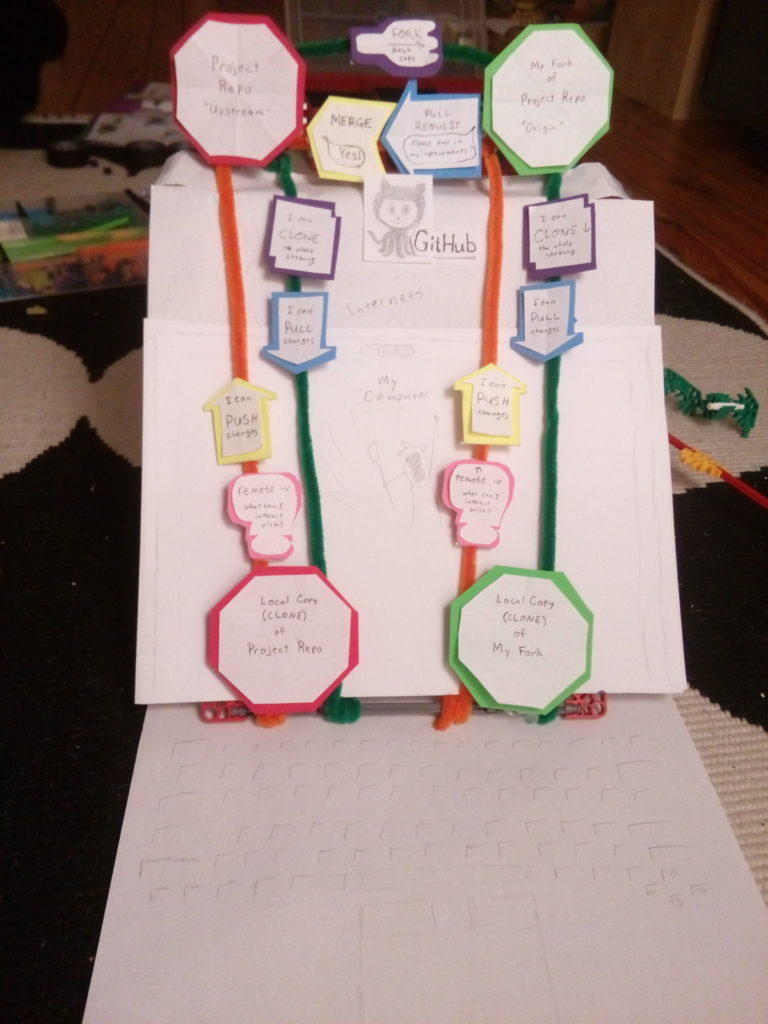
So let’s talk through a common use case: making changes on your local machine and sharing them with a project on which you’re a collaborator. Imagine you and some friends come up with a great idea for a guidebook with multiple authors covering different parts of a topic. You might start in the lower left hand corner of the model, at “Local copy of Project Repo” (ignore the “clone” bit for a moment):
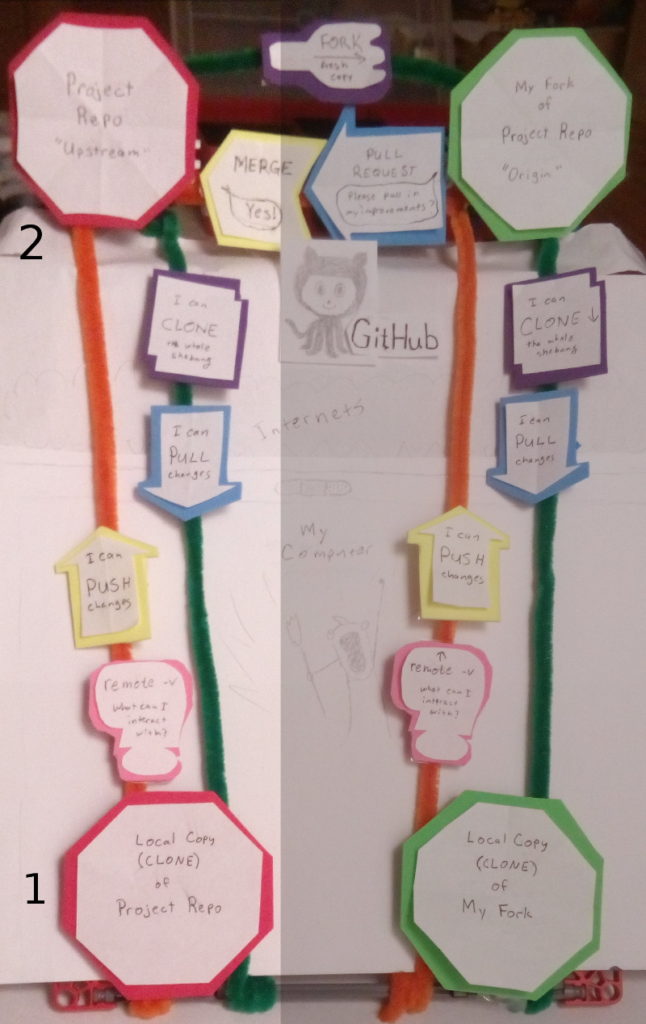
Here, you or a friend make some edits on a local computer, then use git to initialize (init) a repository (repo), and commit the changes to it. Once the project has a little meat on its bones, you decide to make it available to other collaborators by posting it on the Internet, using Github or one of its alternatives. On Github, you can create a repository through the Github web interface.
Next, you give your computer directions to reach the web-based repo by establishing a remote. A “remote” is a shameless noun-ification of an adjective, and it’s best to think of it as a remote location that your local repo can reach. You can name your remotes whatever you want, but the customary names are even worse than “remote”. For example, when you connect your local repo to the repo you created on Github, it’s common practice to name the copy on Github, “origin“. In this early operation, that actually makes no sense–the origin, in fact, is our local computer. But once the repos are connected, it’s likely that the web-based repository will be the one we consider authoritative, and we’ll update our laptop from that copy. Once that relationship is established, “origin” makes a little more sense. We’ll blow that good sense apart in a paragraph or two, but for now let’s nod and smile. Last, we’ll push our committed changes from our local git repository to the remote Github repository.
Now, the early work on our guidebook is posted on the web and our collaborators can reach it on Github, either because we made it viewable to the public or because we invited their Github accounts to our project. Huzzah! Now, how do they start working?
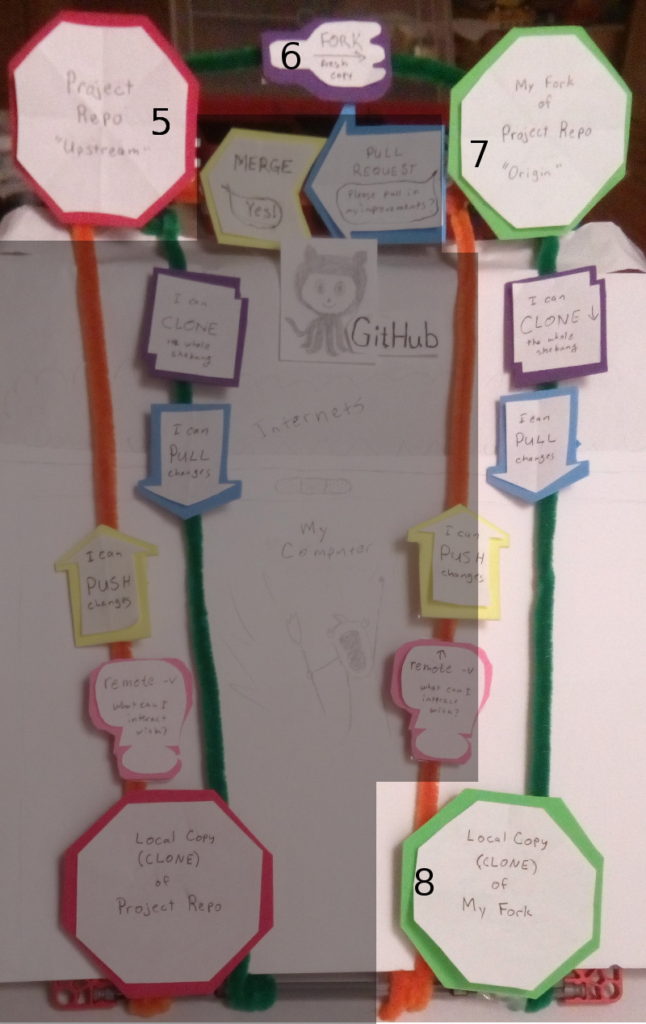
One popular way for collaborators to work on a central project is to make their own copies on Github and their local machines. The first step toward that is to “fork” the repo. This entails the new collaborator asking the Github interface to create a copy of the project and its history under their own account. Sometimes a fork starts a life of its own, evolving into an independent project. Sometimes it’s used as more of a staging area to hold changes that a collaborator recommends for the main project until those changes are approved. Our model shows this latter use.
You’ll notice that at this point, we ostensibly have three copies of the project: the first local project repo, the project repo on Github, and our collaborator’s fork. There’s a fourth copy that makes the new fork extra useful: a copy on our collaborator’s local computer. A local copy lets our partners work on the guidebook in a workspace that’s comfortable for them, then share the changes as they are ready. So we should fork our fork onto our local machine, right? Nope. Ok, then push the repo onto our local machine? Not exactly, but close. In this case, we’ll run a clone command from our computer that will make a copy of our fork and automatically set up our remote.
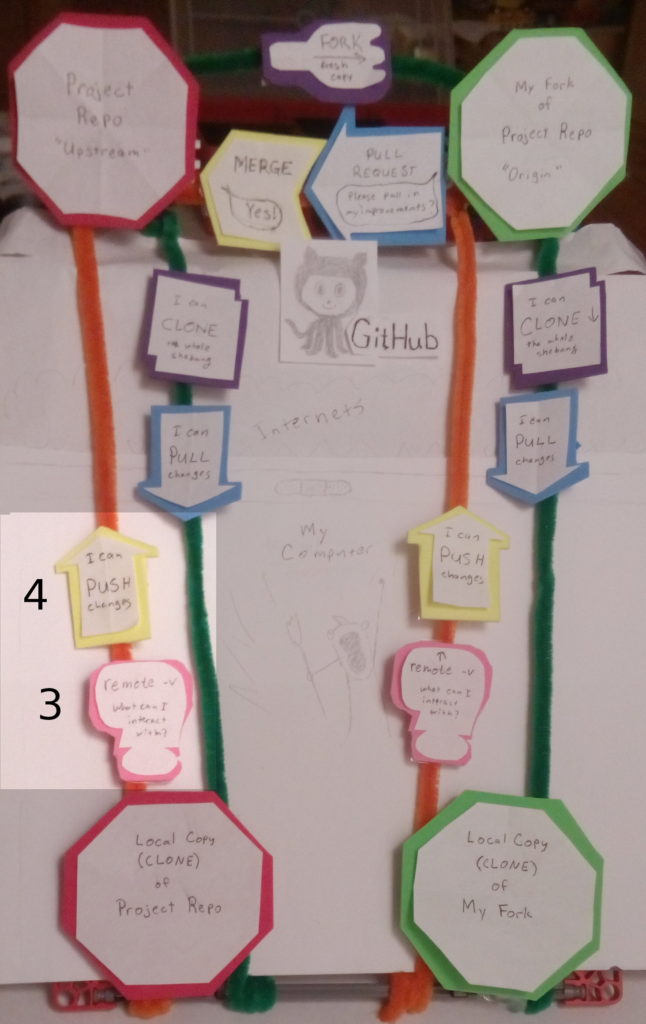
Once that clone is established, we can do the same operations as were allowed between the original repo and its copy on Github. From our local repo, we can remote-v to see which repos we can communicate with (the clone command automatically sets up a pathway between the local copy and our fork), push changes to our fork, pull changes from our fork, and if we want to start over, clone the fork again.
Notice how this clone operation set up a pathway only from our local clone to our fork and called it origin. But I thought “origin” was the name of the project repo on Github? Both statements are true; the term origin is relative to a particular local clone, so if I create more forks and then clone them, each clone will use its corresponding fork as origin by default. Remember that you can use other names if you want; origin is just a convention. But what if we want to reach the project repo on Github so we can update our local copy with changes that our collaborators might have made recently? For that, we start at our local clone and add that repo as a second remote. In this case, the convention is to call it upstream. Notice how arbitrary these terms sound. What’s the difference between origin and upstream? Why is upstream more original than origin? It’s just convention and doesn’t actually map onto a hydrology analogy.
But let’s talk about contributing changes to the project. We know that we can work on our local computer and push changes to the fork. If we have permission on the project repo and we have it attached as an upstream remote, we might even be able to force our changes right into the project repo on Github. But many projects employ a particular social practice that allows changes to be looked over and tested by another person before they are accepted into the project. This practice is called a pull request, and with it is an auxilliary practice called code review.
Code review is exactly what it sounds like: it’s the social practice of one person reviewing another person’s changes. Some good-sense practices include keeping the review fairly small, only approving changes that you’d feel comfortable fixing next time, and if you find a mistake or something you disagree with, assume the person had a good idea behind it and ask about their choice rather than telling them it was wrong. Being polite and open-minded in code reviews will encourage more reviews and a stronger project.
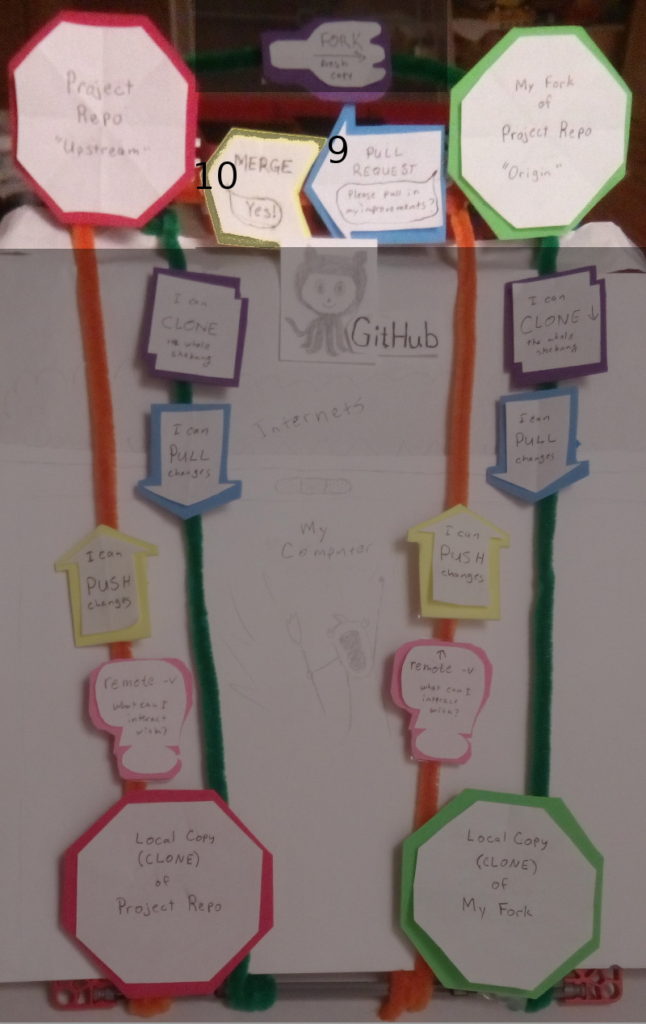
So how do you start a code review? That’s often done with a pull request. This is another one that doesn’t make any sense unless you think of it directionally. A pull request actually means, “I’m making a request: will you please pull in my changes?” So it’s a request that the project maintainer pull your changes. Clear as mud, right? It looks vaguely possible to start a pull request from the git command line using various incantations, but I’ve always done it from the Github interface and that’s fine for most projects.
So you start a pull request and ask someone else on the project to review your changes. They might make comments, ask questions, or request more improvements. Once they give you the thumbs up, often with a LGTM or “looks good to me”, then a person with permissions on the main project can merge your changes. Merging means combining your improvements with the project overall, and saving the history if those improvements in the main project. Congratulations, your first contribution to the guidebook is accepted!
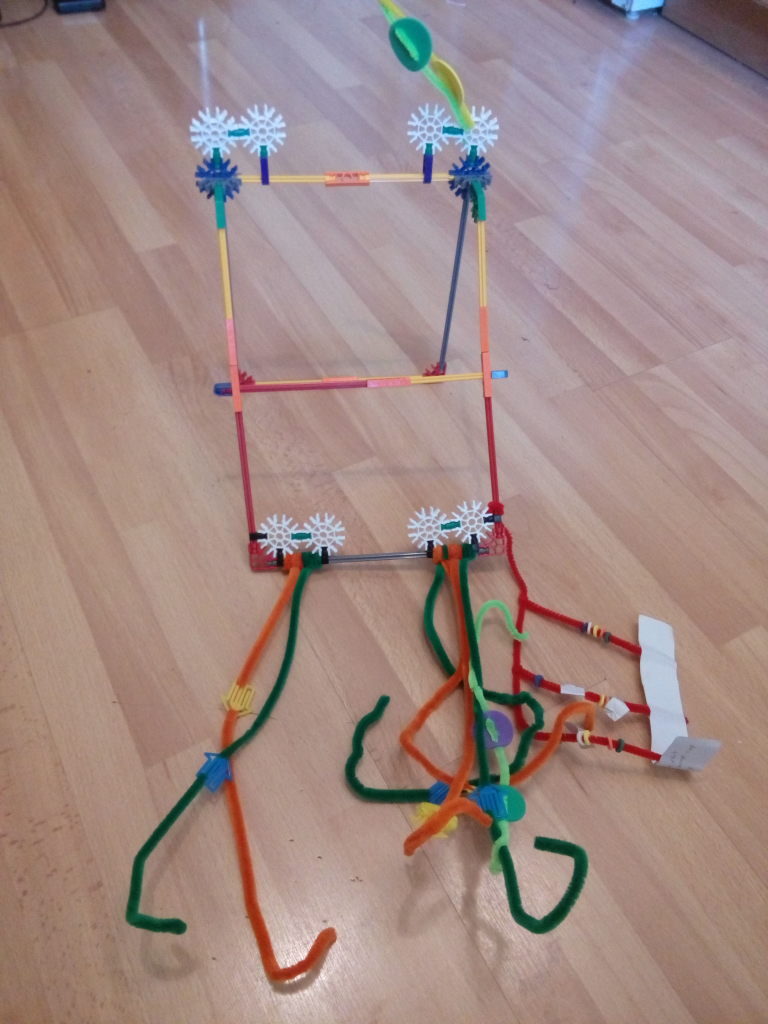
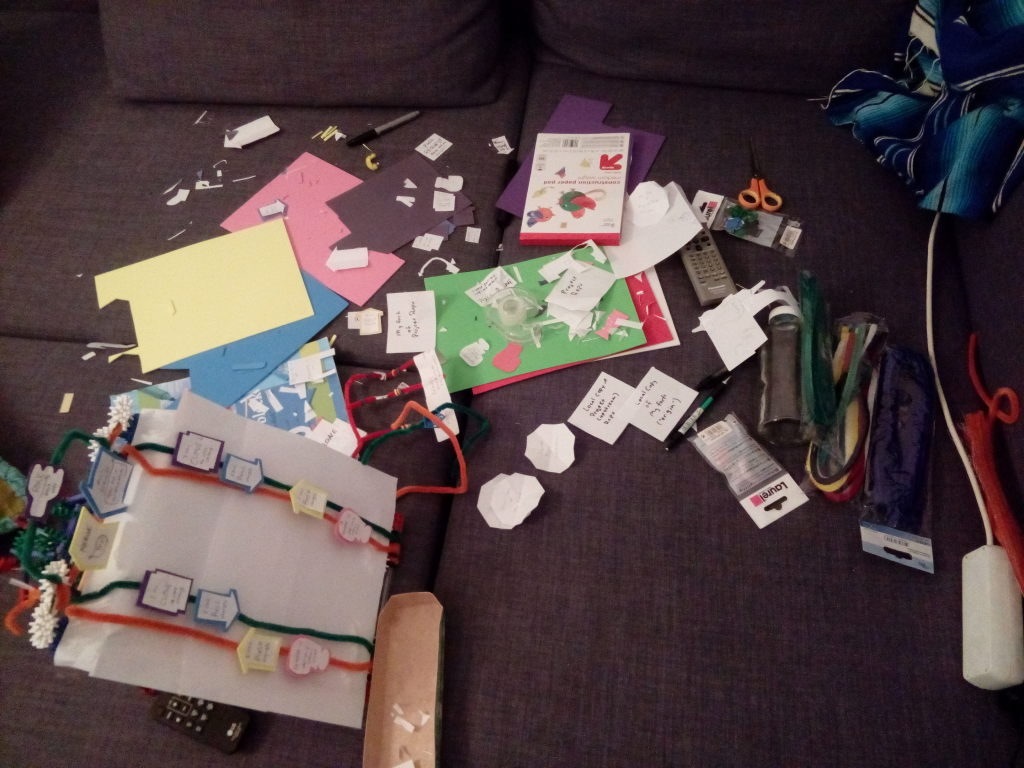
So that’s a simplified, directionally/spatially oriented explanation of how changes move around from place to place. Here are a couple photos of earlier iterations of making the model itself because it was messy and fun.